So you signed up for Hostinger and expected WordPress to be waiting for you, right? Instead, you’re staring at hPanel like it’s the cockpit of a plane you’ve never flown.
Don’t panic — you didn’t break the internet. This happens all the time. A lot of people skip the “install WordPress” option during signup (or need to reinstall later) and end up staring at an empty dashboard.
This guide will walk you through getting WordPress installed — without breaking anything in the process.
Good news: installing WordPress on Hostinger is stupidly easy. Let’s walk through it.
Step 1: Log Into Your Hostinger Account
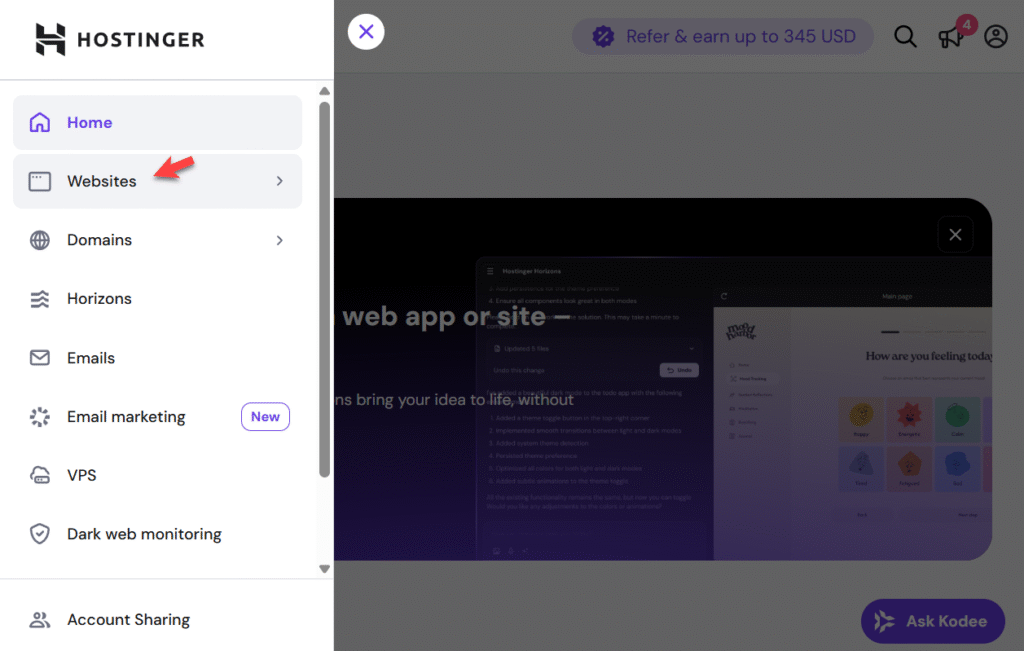
- Go to Hostinger and sign in.
- From your Home page, click Websites.
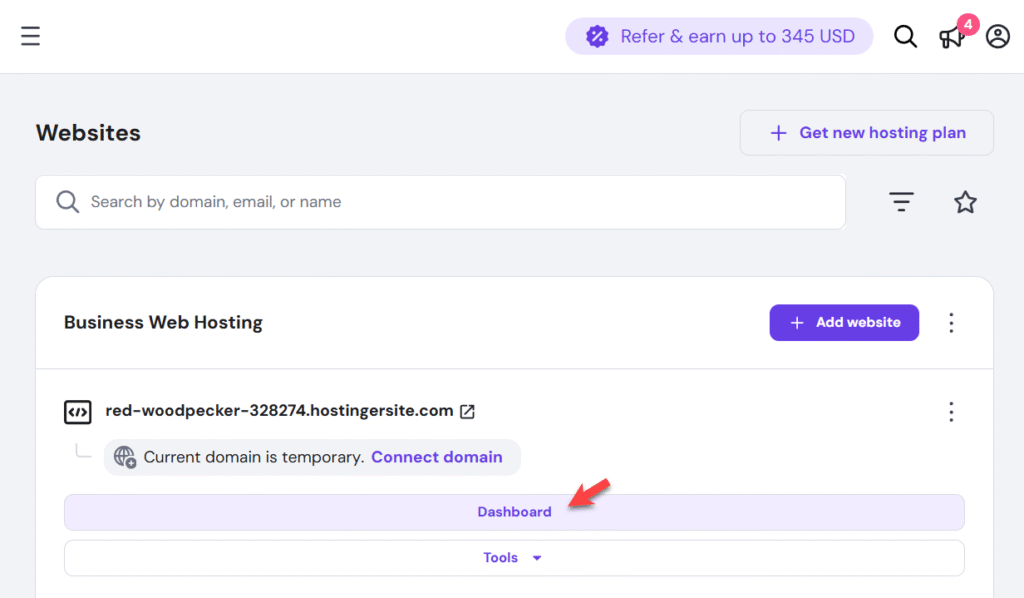
(Tip: if the sidebar’s hidden, click the three horizontal lines in the top-left corner to bring it back.) - Pick the website where you want WordPress installed and click Dashboard.
Pro tip: Don’t panic if your first site lives at something like red-woodpecker-328274.hostingersite.com. You didn’t accidentally adopt a bird. That’s just Hostinger giving you a temporary parking spot until you connect your real domain.
Step 2: Open the Auto Installer
Hostinger doesn’t make you do the old-school FTP upload thing. Instead, they have an Auto Installer that does all the heavy lifting.
- Inside your hosting panel (hPanel), scroll down to Website → Auto Installer.
- Click it.
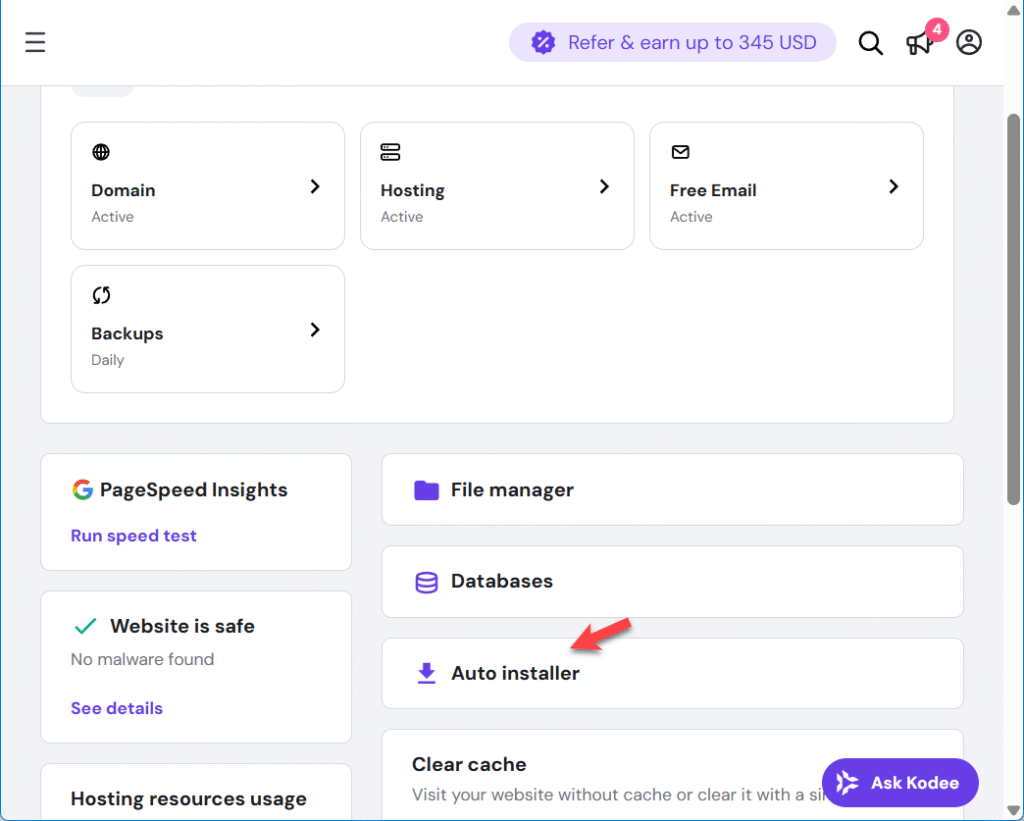
Once you click it you’ll see WordPress sitting there like a friendly option on a diner menu.
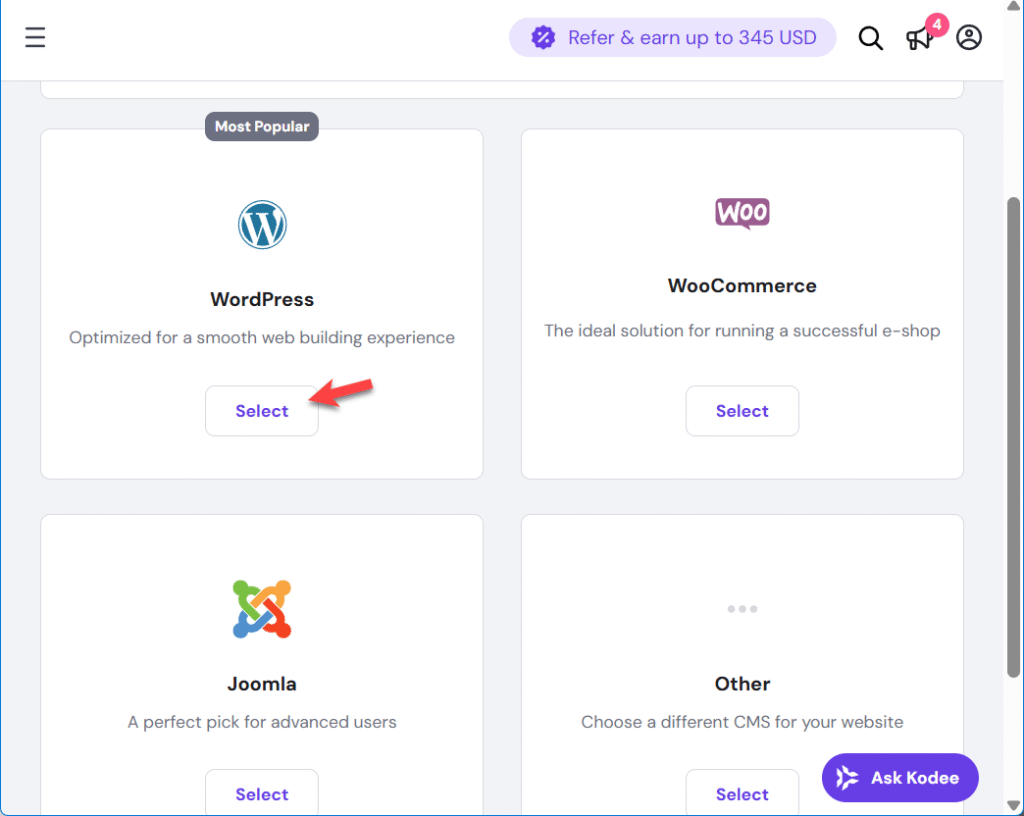
Step 3: Choose WordPress
- Click the WordPress option.
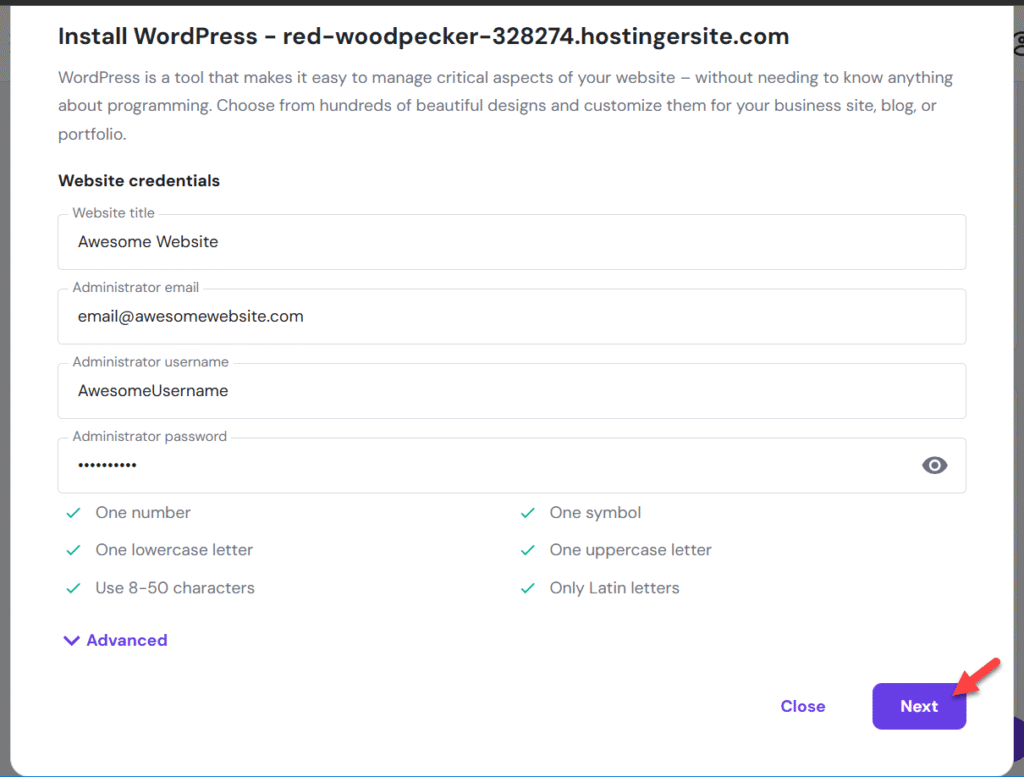
- Hostinger will ask for some basic info:
- Website Title → whatever you want your site called (“Bob’s Cat Blog,” “Acme Corp,” etc.).
- Admin Username & Password → don’t use “admin” and “1234.” Unless you want to get hacked.
- Email Address → this is where WordPress will send you password resets and notifications.
- Fill everything in and then click Next
Step 4: Confirm Installation Settings
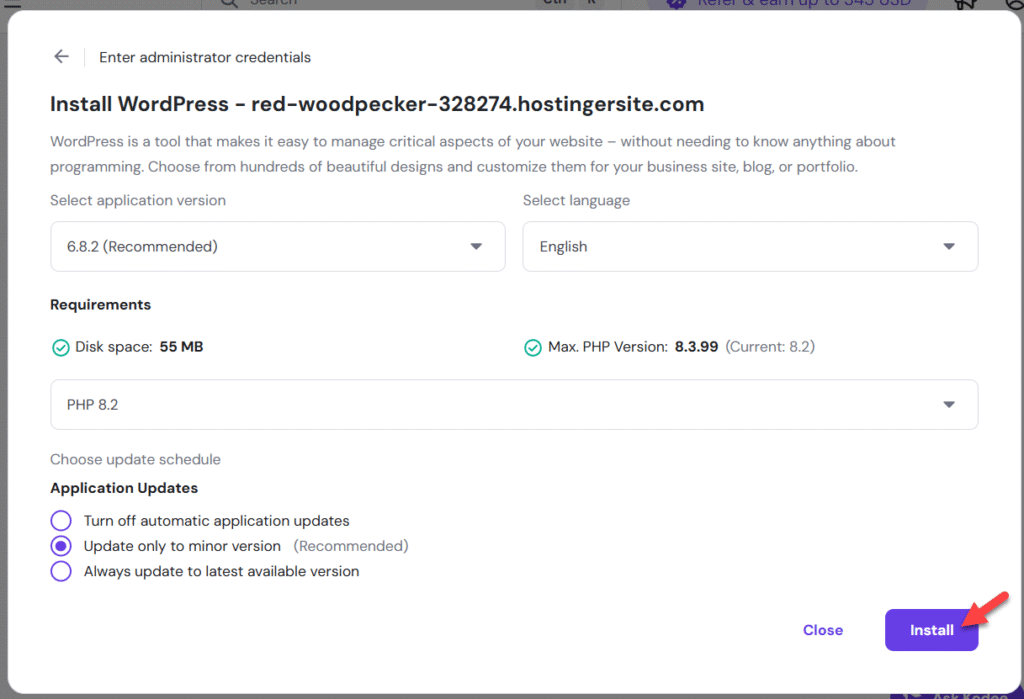
Here’s where Hostinger wants a few last clicks before it spins up WordPress. Don’t worry — you’re not about to launch a space shuttle, just a blog.
What you’ll see:
- WordPress version → It’ll suggest the latest (like 6.8.2). Stick with that unless you’re nostalgic for bugs.
- Language → Default is English, but if you’re building for, say, your French café, switch it here.
- Requirements check → Disk space and PHP version will show green checkmarks. If they don’t, something’s deeply wrong and you should back away slowly.
- Update schedule →
- Update only to minor version (recommended) = safe choice. You’ll get bug fixes without waking up to a broken theme.
- Always update to latest = living on the edge. Works until it doesn’t.
- Turn off updates = the “I like danger” button. Don’t click it.
Once that’s set, hit Install. The big purple button is your friend.
Pro tip: Don’t overthink it. Most people never touch these settings and their sites don’t implode. You’re already ahead by just reading this screen.
Step 5: Hit Install
Once you click Install Hostinger will do its thing. It’ll only take a minute or two.
Behind the scenes, Hostinger is creating databases, copying files, and wiring it all up. You don’t have to touch anything.
Step 6: Log In to WordPress
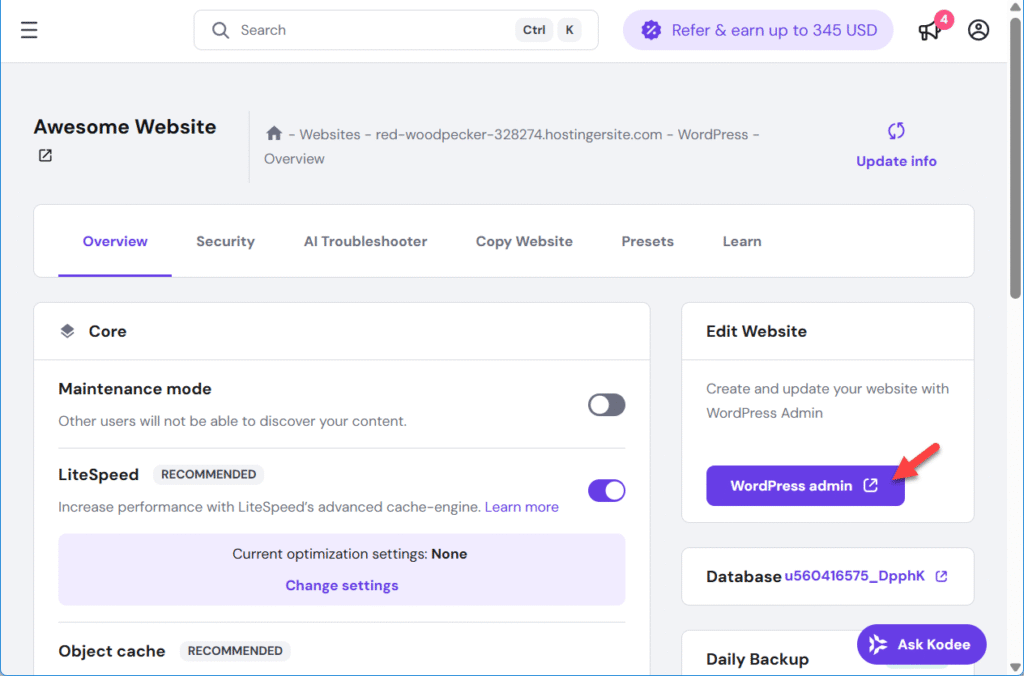
Once the install finishes, your website overview dashboard will open. You can now click the purple WordPress Admin button to open your WordPress dashboard.
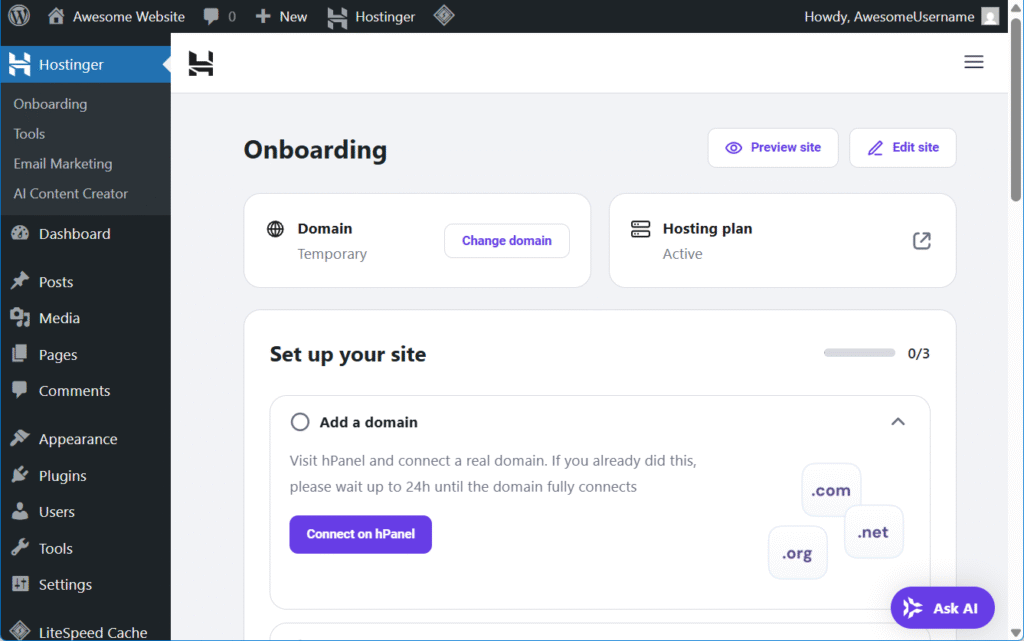
Pro tip: Lost your login link? Just type /wp-admin after your domain name.
Example: yourdomain.com/wp-admin takes you straight to the login screen.
Step 7: Check That It Worked
Type your domain into a browser. You should see the default WordPress site with the classic “Hello World” post.
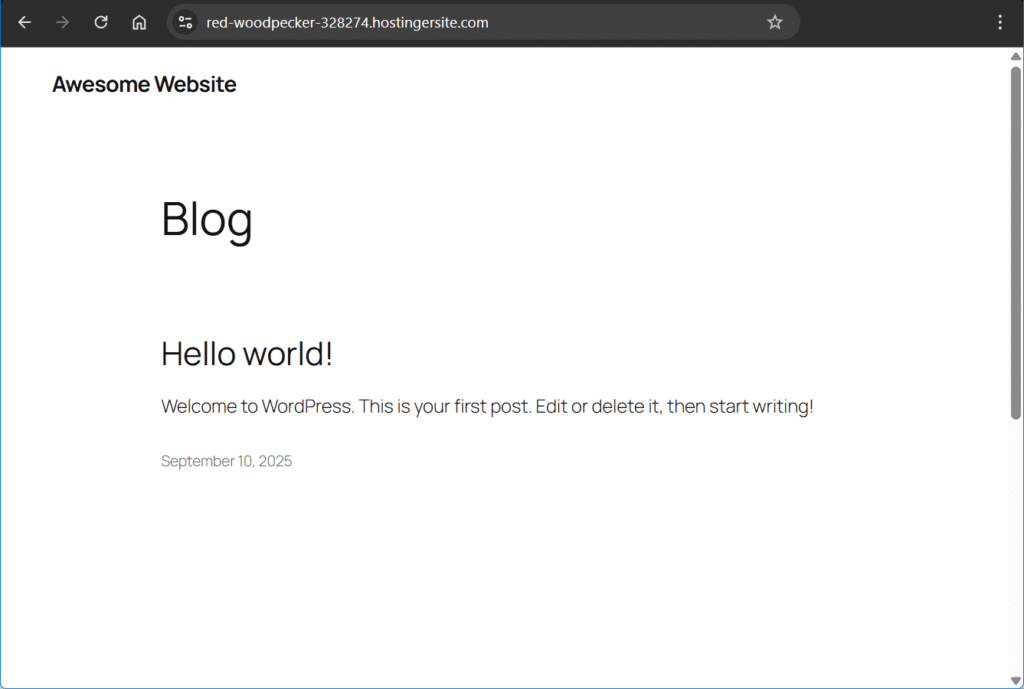
Congratulations, you’ve now got an actual website. It’s ugly, but it’s alive!
Right now your site lives at a temporary Hostinger address. Want to hook up a real domain? Here’s how to buy and connect one
Wrap-Up
Installing WordPress on Hostinger is about as painless as it gets. No need to mess with databases or upload zip files — Hostinger does all the setup for you.
From here you can:
- Install a theme (to make it look less like a 2008 blog).
- Add plugins (contact forms, SEO, etc.).
- And of course, you’ll want your own domain name instead of that temporary Hostinger link. I’ve got you covered: How to buy and connect a custom domain on Hostinger.
But hey — the hard part’s done. Your site is officially up and running.
Leave a Reply