So you bought a domain on Namecheap — maybe it’s your dream project, maybe it’s something goofy like lookmomablog.com — and now you want it to actually point to your Hostinger site instead of a boring “parked” page. Good call. This is the step that takes your site from “placeholder page” to a real, polished home on the web.
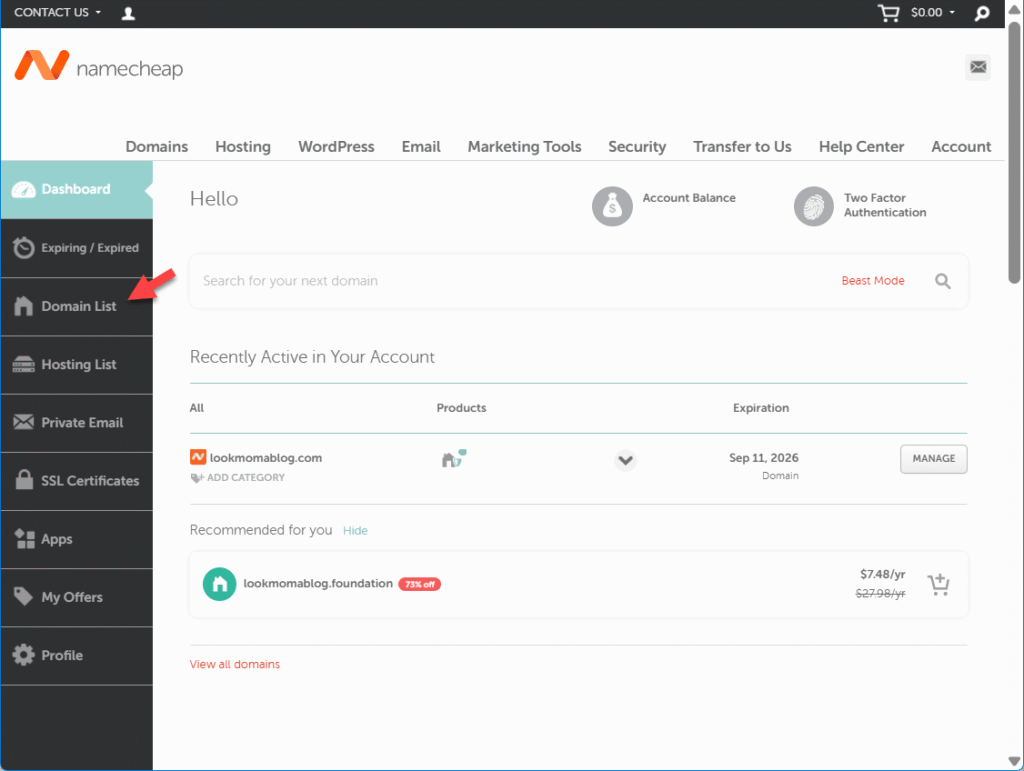
Step 1: Find Your Domain in Namecheap
Log in to Namecheap, and in the sidebar click Domain List.
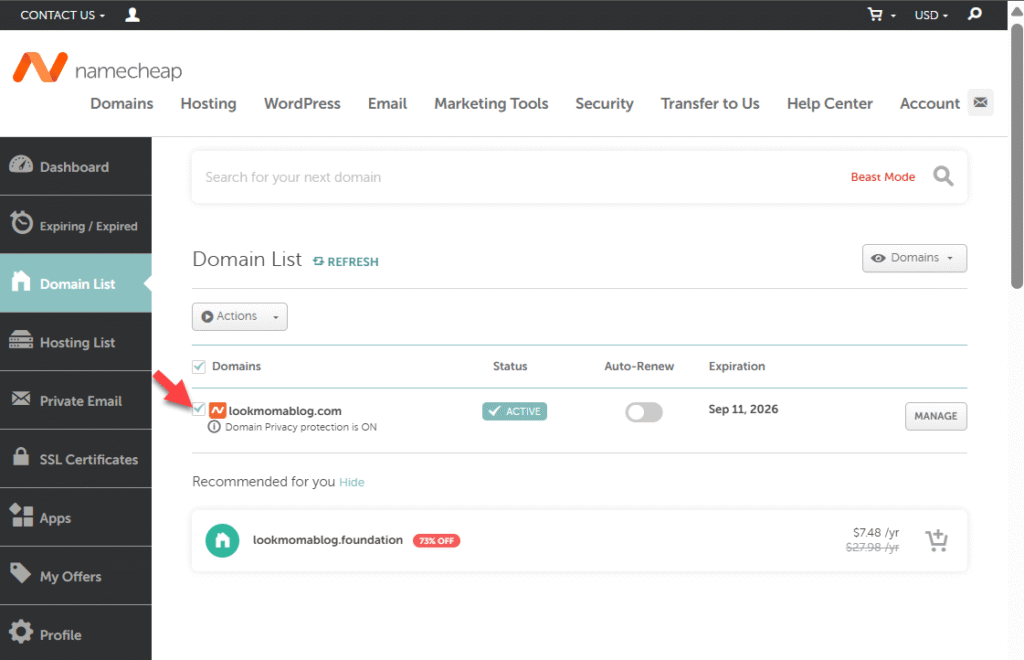
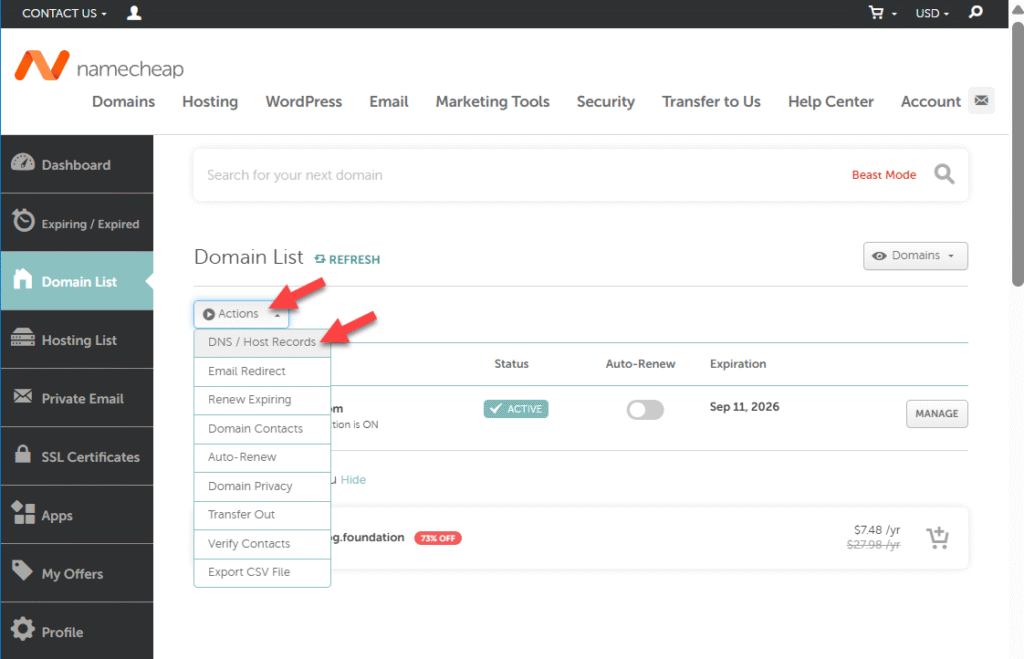
Step 2: Open the DNS Settings
You’ll see all your domains listed. Check the box next to your domain, then click Actions and then DNS / Host Records.
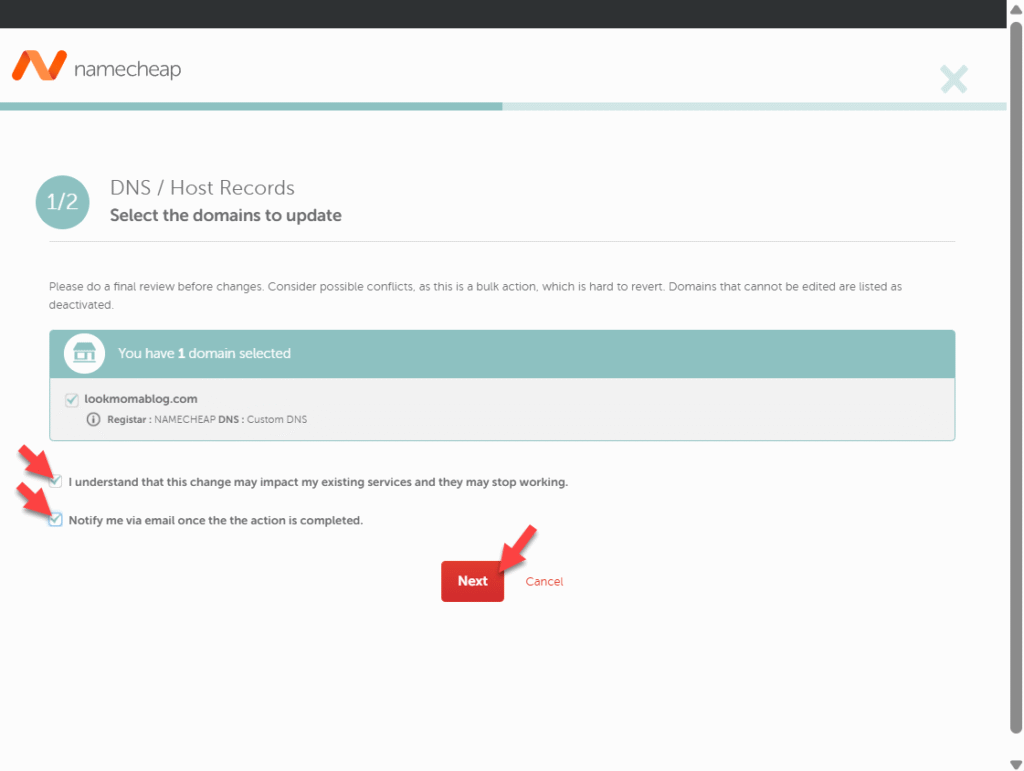
Step 3: DNS Change Disclaimer
Namecheap will make you check a couple boxes like “Yes, I know what I’m doing” and then hit Next.
Don’t worry, DNS sounds scarier than it is. I’ll walk you through the exact clicks so you can get everything connected without the headache.
Pro Tip: DNS (Domain Name System) is basically the internet’s address book. It matches a website’s name to the server where the site lives, so visitors end up in the right place.
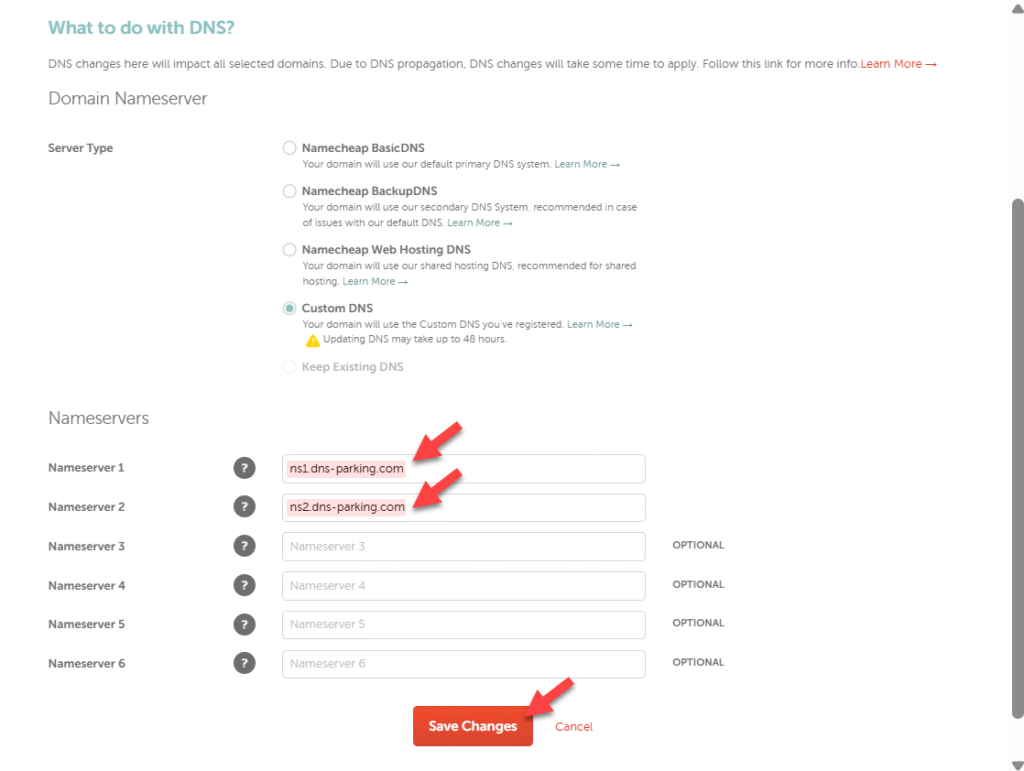
Step 4: Switch to Custom DNS
On the DNS page, select Custom DNS.

That just means you’re telling Namecheap, “Hey, don’t park my domain — send it to Hostinger instead.”
Step 5: Enter Hostinger’s Nameservers
Replace whatever’s there with Hostinger’s defaults:
ns1.dns-parking.com
ns2.dns-parking.com
Click Save Changes.
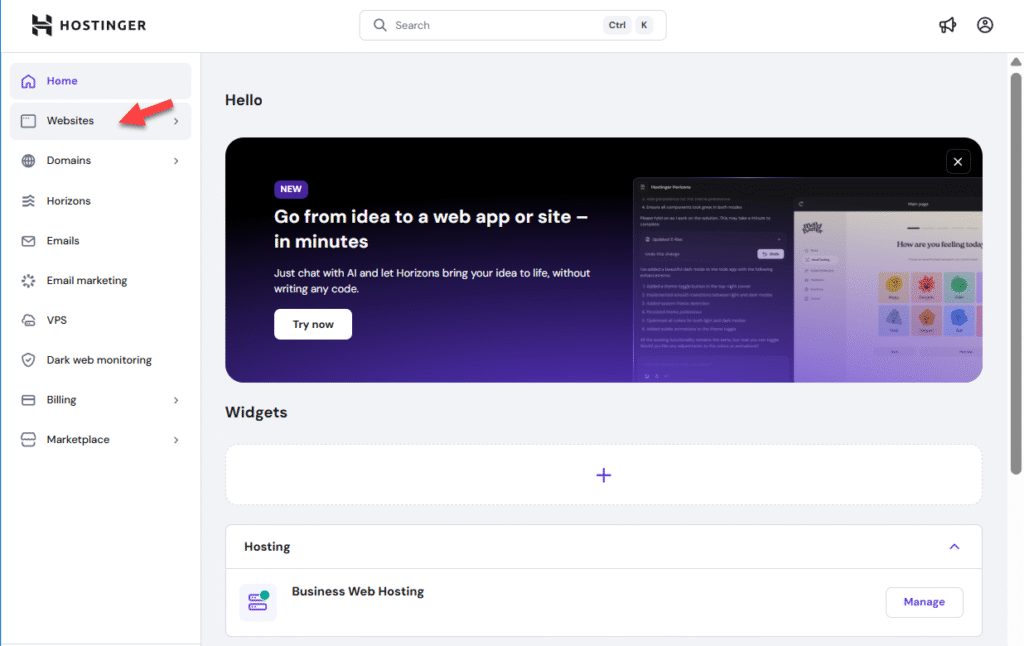
Step 6: Connect It in Hostinger
Sign in to your Hostinger account. On the dashboard click Websites.
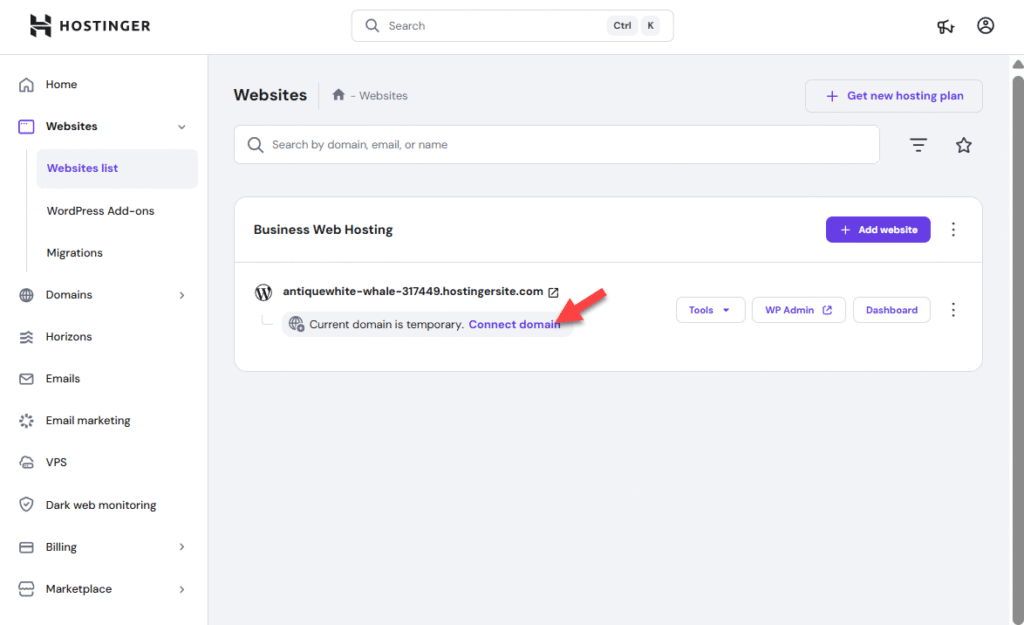
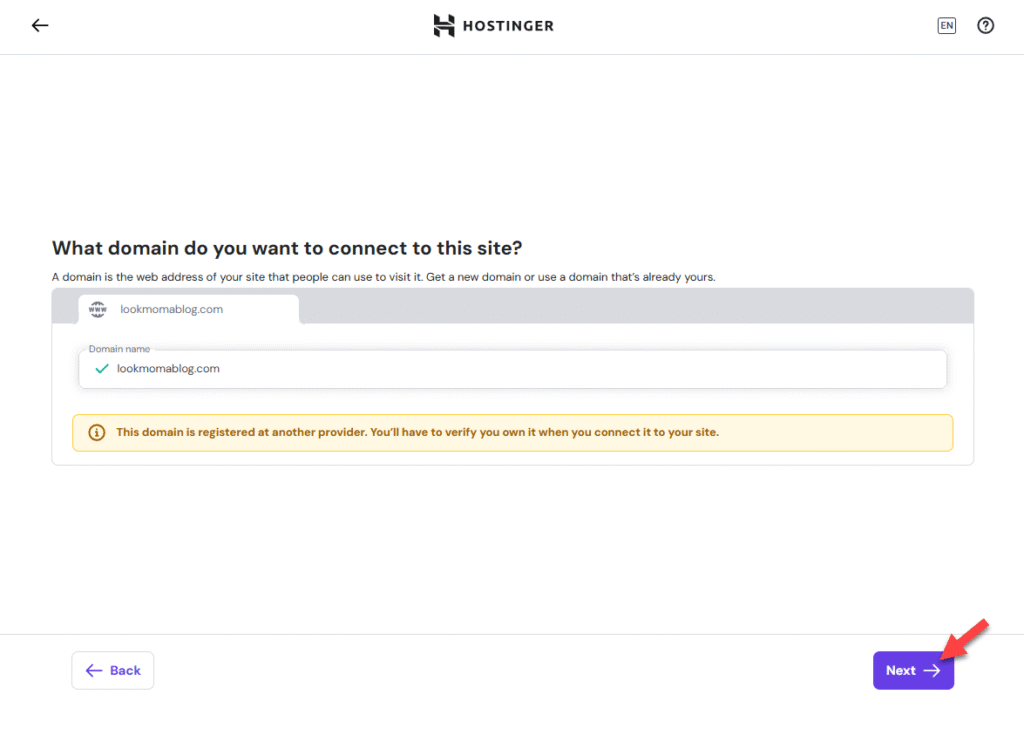
On your websites list, find the website you want to connect to your Namecheap domain and click Connect Domain.
Enter your Namecheap domain (like lookmomablog.com) and select it in the dropdown menu.
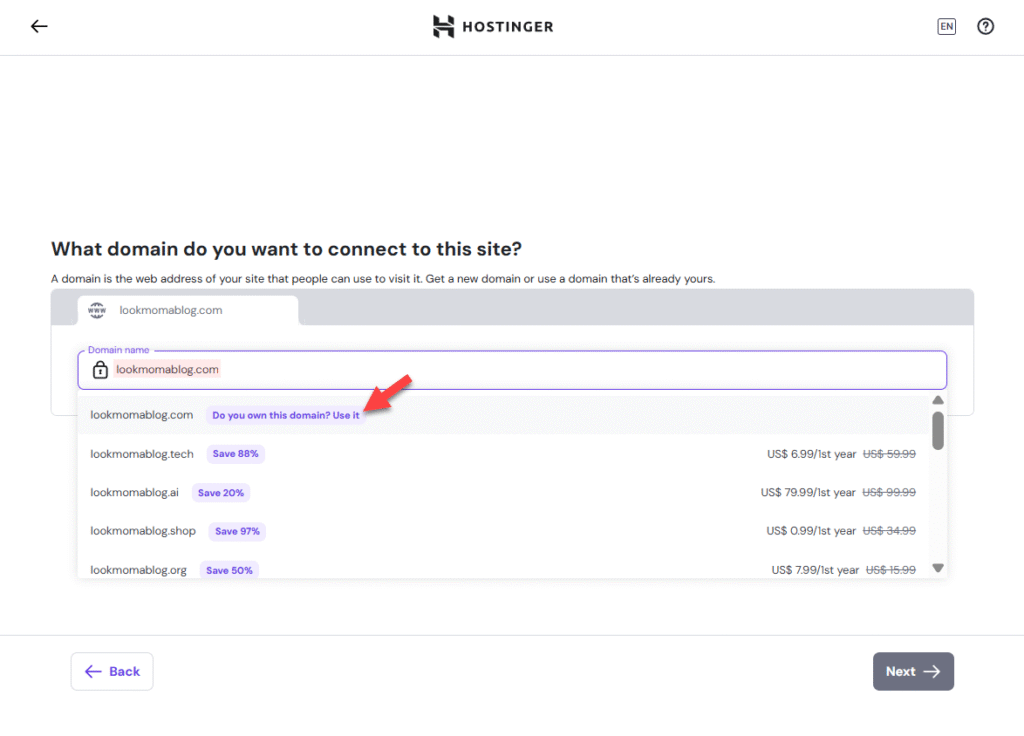
Hostinger will give you a heads-up that the domain is registered with another provider (duh!). Click next to proceed.
Step 7: Wait It Out
DNS changes take time. Sometimes it’s minutes, sometimes it’s hours, occasionally it feels like days. Just let it do its thing. If your site doesn’t show up right away, that doesn’t mean you messed it up.
Hostinger will check the nameservers, and once it sees them, your domain will be live.
Pro Tip: Sometimes your browser is the slowpoke, not the DNS. If you’ve just changed nameservers but your site still won’t load, try clearing your browser cache or opening it in a private/incognito window. That forces your browser to fetch the fresh DNS info instead of clinging to the old one.
Final Note
That’s it — your domain is no longer floating in space. It’s officially tied to your Hostinger hosting. Combine this with SSL (see my SSL setup guide) and you’re all set with a professional-looking site.
Leave a Reply